Building a Document-Savvy AI Agent: A Pinecone and OpenAI Love Story with a Sprinkle of ReactJS

Introduction
Ever tried talking to an AI that’s supposed to help you with a document, but instead, it starts telling you about Napoleon’s battles? Yeah, we’ve all been there. But what if I told you that you could build an AI assistant that actually listens, understands, and gives contextually accurate answers?
Welcome to the journey of building a document-savvy AI agent — an app that lets you upload documents, ask questions, and get spot-on answers. In this article, we’ll dive into how I combined Pinecone, OpenAI, ReactJS, and a little magic from NodeJS to create an agent smarter than your average FAQ bot.
What We’re Building
The idea is simple: A user uploads a document (like a FAQ or user guide), asks a question about the content, and gets an answer. Here’s how it works:
- Upload Documents: The user uploads a PDF or plain text document.
- Vectorize the Content: Using OpenAI, we convert the text into numerical embeddings.
- Store Embeddings: Pinecone acts as our vector database, storing these embeddings for quick retrieval.
- Query and Respond: When a user asks a question, Pinecone finds the most relevant sections of the document, and OpenAI generates a thoughtful answer.
Why These Technologies?
- Pinecone: A powerful vector database that lets you perform lightning-fast searches on embeddings.
- OpenAI: The brains behind the operation, turning text into embeddings and embeddings into insightful answers.
- ReactJS: For building a frontend that’s as slick as it is functional.
- NodeJS: The glue that holds the entire backend together.

Step-by-Step Execution Plan:
1. Set Up Pinecone:
- Create an account on Pinecone and set up a vector index.
- Configure your NodeJS backend to interact with Pinecone’s API.
2. Integrate OpenAI API:
- Use OpenAI’s API for embedding generation and answer generation.
- Ensure proper error handling and rate limiting.
3. Create Frontend (ReactJS):
- Build components for file upload, search bar, and chat interface.
- Fetch data from backend APIs and display results dynamically.
4. Develop Backend APIs (NodeJS):
- Build endpoints for document upload, vectorization, and querying.
- Add endpoints for user management and analytics (if using Postgres).
5. Optional: Add Postgres Integration:
- Design tables for user data, document metadata, and query logs.
- Implement APIs to read/write data from Postgres.
6. Deploy:
- Deploy the app using services like Vercel (frontend) and AWS/Heroku/Render (backend).
Let’s Build It

1. Setting Up Pinecone: The Vector Ninja
Pinecone is like that friend who remembers everything — efficiently and at scale. It stores vector embeddings of your document and retrieves them in the blink of an eye.
Just create an account in Pinecone through the URL https://www.pinecone.io/

Once you’re in, you need to create an API Key. It should already be created by default. If not, just go ahead and create one.

Save the API Key somewhere safe.
Next, go to Databases and create an Index.

I gave the index name as document-savvy-ai-agent-embeddings. I kept the Dimensions to 1536 and the Metric to cosine similarity.
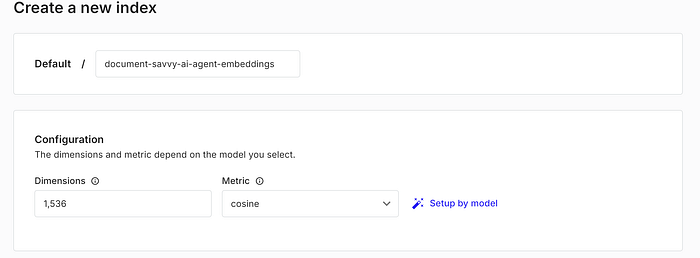
For now, don’t sweat the small stuff about dimensions and metrics — no need to lose sleep over it! I’ll whip up a separate article to dive into all the juicy details soon. Just keep this little cheat code in mind: for OpenAI embeddings, think 1536 + cosine. It’s the secret sauce combo you need, plain and simple!
I kept the database hosting option as serverless, the cloud provider as AWS and the Region as us-east-1. You can choose your own.

2. Setting Up OpenAI: The Brain of the Operation
The real MVP of this POC is OpenAI, which does two things:
- Generates embeddings for document content (via
text-embedding-ada-002). - Answers questions based on Pinecone’s retrieved context.
Think of embeddings as the AI’s way of saying, “I don’t just read your text; I understand it deeply.”
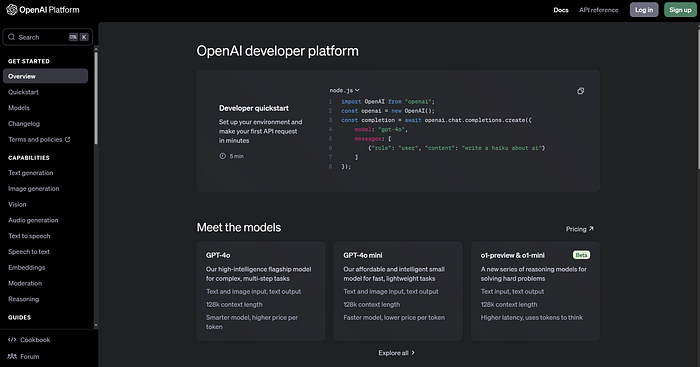
Assuming that you have an OpenAI account created already, log in/sign up to the OpenAI API platform through the link https://platform.openai.com/
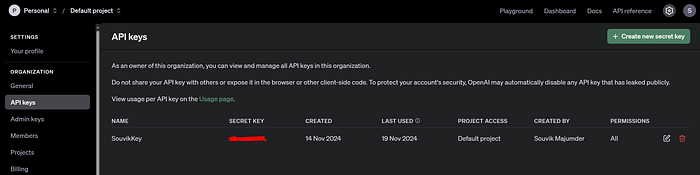
Once you’re in, navigate to the API Keys tab under Organization and create a new API or Secret Key. I used the Default project for my POC.
Alright, here’s the deal: normally, when you log in for the first time, the OpenAI API platform hands you a nice little gift of $5 credit. But when I logged in, I was greeted with… a big ol’ zero balance! Additionally, when I was trying to hit the OpenAI APIs for embedding my document (which I have explained in the sections below), I was getting a 429 — usage limit error!
So, off I went to the Billing section to add a payment method and topped it up with $5 just to get my proof of concept rolling. If you’re curious about the pricing plans (or just want to make sure you don’t end up in my shoes), be sure to check out the details here: https://openai.com/api/pricing/.
Just to help you out with a rough calculation, the PDF that I used for testing consisted 463 words in total.
Estimated Total Tokens: 615 tokens
- Calculated using the average of 1.33 tokens per word.
Embedding Cost: $0.000246
- Based on $0.0004 per 1,000 tokens for embeddings.
Completion Cost: $0.02763
Assuming 50% tokens for prompt and 50% for completion using GPT-4’s pricing:
- Prompt: $0.03 per 1,000 tokens.
- Completion: $0.06 per 1,000 tokens.
Total Cost: $0.027876 (~₹2.35 in INR, assuming 1 USD = 84.40 INR)
Remember that OpenAI APIs are billed separately from ChatGPT Plus, Teams, and Enterprise. The API has its own pricing, which can be found at openai.com/pricing. ChatGPT subscription pricing can be found at openai.com/chatgpt/pricing/.
Coming back to our mission,
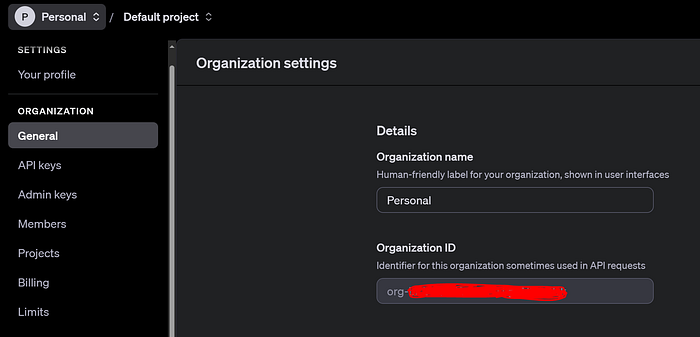
You need to navigate now to the General tab under Organization and copy the Organization ID somewhere safe.
Same for the Project ID from the General tab under Project.
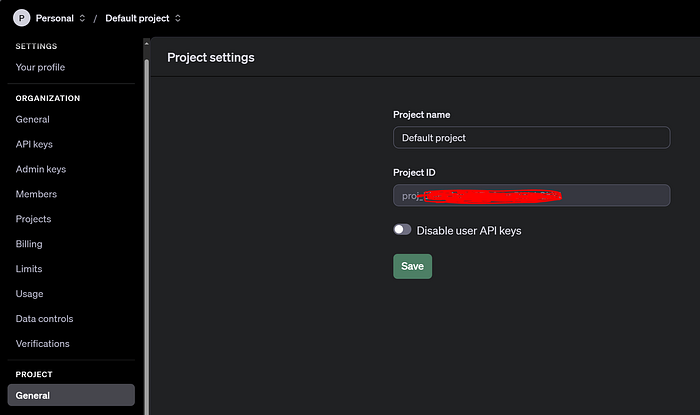
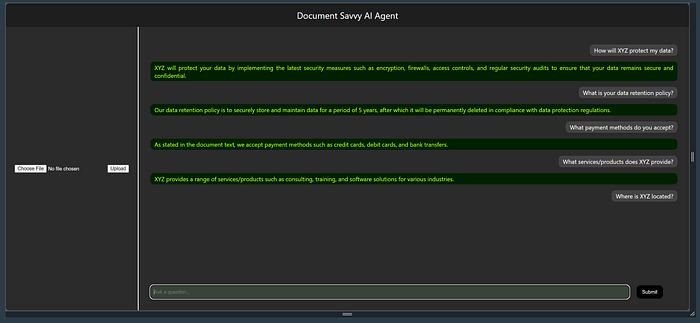
3. ReactJS: The Charming Frontend
The frontend is where the magic meets the user. I built two key components:
- File Upload: For uploading documents.
- Chat Interface: For asking questions and receiving answers.
Project Setup
npx create-react-app frontend
cd frontend
React App Structure
frontend/
├── src/
│   ├── components/
│   │   ├── FileUpload.js
│   │   ├── ChatInterface.js
│   ├── App.js
FileUpload.js
import React, { useState } from 'react';

const FileUpload = () => {
    const [file, setFile] = useState(null);

    const handleFileChange = (e) => setFile(e.target.files[0]);

    const handleUpload = async () => {
        const formData = new FormData();
        formData.append('file', file);

        const response = await fetch('http://localhost:5000/upload', {
            method: 'POST',
            body: formData
        });

        if (response.ok) {
            alert('File uploaded successfully!');
        } else {
            alert('File upload failed!');
        }
    };

    return (
        <div className='file-upload-section'>
            <input type="file" onChange={handleFileChange} />
            <button onClick={handleUpload}>Upload</button>
        </div>
    );
};

export default FileUpload;
ChatInterface.js
import React, { useEffect, useRef, useState } from 'react';

const ChatInterface = () => {
    const chatInterface = useRef(); // For chat interface scrolling and DOM updates
    const queryRef = useRef(); // For the input field reference
    const typingTimeoutRef = useRef(null); // To persist typing timeout
    const [question, setQuestion] = useState(''); // User's input
    const [botTyping, setBotTyping] = useState(false); // Bot typing state
    const [userTyping, setUserTyping] = useState(false); // User typing state
    const [messages, setMessages] = useState([]); // Chat messages (user and bot)

    const handleQuery = async (event) => {
        if (event) event.preventDefault(); // Prevent form submission reload

        if (!question.trim()) return; // Ignore empty queries

        // Add the user's query to the chat interface
        setMessages((prevMessages) => [
            ...prevMessages,
            { sender: 'user', text: question },
        ]);
        setQuestion(''); // Clear input field
        queryRef.current.value = ''; // Clear the field visually

        try {
            // Indicate bot is typing
            setBotTyping(true);

            // Send the query to OpenAI
            const response = await fetch('http://localhost:5000/query', {
                method: 'POST',
                headers: {
                    'Content-Type': 'application/json',
                },
                body: JSON.stringify({ question }),
            });

            const data = await response.json();
            setBotTyping(false);

            // Add bot's response to the chat interface
            setMessages((prevMessages) => [
                ...prevMessages,
                { sender: 'bot', text: data.answer || 'Sorry, no response found.' },
            ]);

            // Scroll to the latest message
            chatInterface.current.scrollTop = chatInterface.current.scrollHeight;
        } catch (error) {
            console.error('Error:', error);
            setBotTyping(false);
            setMessages((prevMessages) => [
                ...prevMessages,
                { sender: 'bot', text: 'Oops! Something went wrong. Please try again.' },
            ]);
        }
    };

    const handleUserTyping = (e) => {
        setQuestion(e.target.value);
        setUserTyping(true);

        // Clear existing timeout and reset typing state after delay
        clearTimeout(typingTimeoutRef.current);
        typingTimeoutRef.current = setTimeout(() => {
            setUserTyping(false); // User stopped typing
        }, 1000); // 1-second delay after the last keystroke
    };

    useEffect(() => {
        // Cleanup timeout on unmount
        return () => clearTimeout(typingTimeoutRef.current);
    }, []);

    return (
        <div className="chat-interface">
            <div ref={chatInterface} className="chat-interface-section">
                {messages.map((msg, index) => (
                    <p
                        key={index}
                        className={msg.sender === 'user' ? 'user-query' : 'bot-answer'}
                    >
                        {msg.text}
                    </p>
                ))}
            </div>
            {botTyping && <p className="typing-text">Bot is typing...</p>}
            {userTyping && <p className="typing-text">User is typing...</p>}
            <div className="query">
                <form onSubmit={handleQuery}>
                    <input
                        ref={queryRef}
                        type="text"
                        value={question}
                        onChange={handleUserTyping}
                        placeholder="Ask a question..."
                    />
                    <button type="submit">Submit</button>
                </form>
            </div>
        </div>
    );
};

export default ChatInterface;
App.js
import React from 'react';
import FileUpload from './components/FileUpload';
import ChatInterface from './components/ChatInterface';
import "./App.css";

const App = () => (
  <div className='App'>
    <div className='header'>Document Savvy AI Agent</div>
    <div className='main custom-row'>
      <FileUpload />
      <ChatInterface />
    </div>
  </div>
);

export default App;
App.css
.App {
  text-align: center;
  background-color: rgb(43, 43, 43);
  color: #fff;
  height: 100vh;
}

.custom-row {
  display: flex;
  flex-direction: row;
}

.custom-col {
  display: flex;
  flex-direction: column;
}

.header {
  background-color: rgb(30, 30, 30);
  position: fixed;
  top: 0;
  left: 0;
  width: 100%;
  height: 4rem;
  display: flex;
  justify-content: center;
  align-items: center;
  font-size: 1.5rem;
}

.main {
  padding-top: 4rem;
  width: 100%;
  height: calc(100% - 4rem);
  overflow-x: hidden;
  overflow-y: auto;
}

.file-upload-section {
  width: 20%;
  border-right: 3px solid #ccc;
  display: flex;
  justify-content: center;
  align-items: center;
}

.chat-interface {
  padding: 2rem;
  width: 80%;
}

.chat-interface-section {
  height: 90%;
  overflow-y: auto;
}

.query {
  position: fixed;
  bottom: 0;
  width: 75%;
  display: flex;
  padding: 2rem 0;
}

.query form {
  display: flex;
  width: 100%;
}

.query form input {
  width: 100%;
  height: 2rem;
  background-color: #384339;
  border: none;
  color: #fff;
  padding: 2px 10px;
  border-radius: 10px;
}

.query form button {
  margin-left: 20px;
  background-color: black;
  border: none;
  color: #fff;
  border-radius: 10px;
  cursor: pointer;
  padding: 0 15px;
}

.bot-answer {
  background-color: rgb(0, 32, 0);
  color: greenyellow;
  padding: 0.3rem 0.7rem;
  border-radius: 10px;
  text-align: justify;
}

.user-query {
  width: fit-content;
  background-color: rgb(68, 68, 68);
  padding: 0.3rem 0.7rem;
  border-radius: 10px;
  text-align: justify;
  display: flex;
  justify-self: flex-end;
}

.typing-text {
  text-align: left;
}
4. NodeJS: The Glue Holding it All Together
The backend acts as a bridge between Pinecone, OpenAI, and the React frontend.
Project Setup
# Initialize Node.js Project
mkdir backend && cd backend
npm init -y

# Install Required Dependencies
npm install express multer @pinecone-database/pinecone openai dotenv body-parser cors pdf-parse
Backend File Structure
backend/
├── app.js
├── routes/
│   ├── upload.js
│   ├── query.js
├── services/
│   ├── pineconeService.js
│   ├── openaiService.js
├── .env
├── package.json
Environment Variables
Create a .env file to store sensitive keys:
## Open AI Configuration
OPENAI_API_KEY=XXXXXXXXXXXXXXXXXXXXXXXXXXXXXXXXXXXXXXXXXX
OPENAI_ORGANIZATION=org-XXXXXXXXXXXXXXXXXXXXXXXXXXXXX
OPENAI_PROJECT_ID=proj_XXXXXXXXXXXXXXXXXXXXXXXX

## PineCone Configuration
PINECONE_API_KEY=XXXXXXXXXXXXXXXXXXXXXXXXXXXXXXXXXX
PINECONE_INDEX_NAME=document-savvy-ai-agent-embeddings

## PostgreSQL Configuration
POSTGRES_URL=your_postgres_connection_url
app.js (Main File)
The API has two endpoints:
/upload: Takes a document, extracts text, generates embeddings, and stores them in Pinecone./query: Accepts a question, retrieves context from Pinecone, and gets answers from OpenAI.
import express from 'express';
import cors from 'cors';
import uploadRoutes from "./routes/upload.js";
import queryRoutes from './routes/query.js';
import bodyParser from 'body-parser';
import dotenv from 'dotenv';
dotenv.config();

const app = express();
const PORT = 5000;

// Middleware
app.use(cors());
app.use(bodyParser.json());
app.use(bodyParser.urlencoded({ extended: true }));

// Routes
app.use('/upload', uploadRoutes);
app.use('/query', queryRoutes);

// Start Server
app.listen(PORT, () => {
    console.log(`Server is running on http://localhost:${PORT}`);
});
upload.js (Document Upload Endpoint)
import express from 'express';
import multer from 'multer';
import pdfParse from 'pdf-parse';
import fs from "fs";
import { generateEmbedding } from '../services/openaiService.js';
import { storeEmbedding } from '../services/pineconeService.js';

const router = express.Router();

const uploadDirectory = './uploads';

const storage = multer.diskStorage({
    destination: (req, file, cb) => {
        cb(null, 'uploads/');
    },
    filename: (req, file, cb) => {
        cb(null, file.originalname);
    }
});
const upload = multer({ storage });

router.post('/', upload.single('file'), async (req, res) => {
    try {
        // Check if a file was uploaded
        if (!req.file) {
            return res.status(400).json({ error: 'No file uploaded' });
        }

        // Retrieve the uploaded file from the request body
        const uploadedFile = req.file;
        const fileName = `${uploadedFile.originalname}`;
        const filePath = `${uploadDirectory}/${fileName}`;

        // Read the file as a buffer
        const fileBuffer = fs.readFileSync(filePath);
        const pdfData = await pdfParse(fileBuffer); // Extract text from PDF
        const text = pdfData.text;

        // Generate embeddings
        const embedding = await generateEmbedding(text);

        // Store embeddings in Pinecone
        await storeEmbedding(req.file.originalname, embedding);

        res.json({ message: 'Document uploaded and indexed successfully' });
    } catch (error) {
        console.log(error)
        res.status(500).json({ error: error.message });
    }
});

export default router;
query.js (Query Endpoint)
import express from 'express';
import { queryPinecone } from '../services/pineconeService.js';
import { generateAnswer } from '../services/openaiService.js';
const router = express.Router();

router.post('/', async (req, res) => {
    const { question } = req.body;

    try {
        // Retrieve relevant embeddings
        const context = await queryPinecone(question);

        // Generate answer using OpenAI
        const answer = await generateAnswer(question, context);

        res.json({ answer });
    } catch (error) {
        res.status(500).json({ error: error.message });
    }
});

export default router;
pineconeService.js (Pinecone Integration)
import { Pinecone } from '@pinecone-database/pinecone';
import { generateEmbedding } from './openaiService.js';
import https from 'https';
import dotenv from 'dotenv';
dotenv.config();

process.env.NODE_TLS_REJECT_UNAUTHORIZED = '0';

const agent = new https.Agent({
    rejectUnauthorized: false, // Disable SSL certificate validation (not secure for production)
});

const pc = new Pinecone({
    apiKey: process.env.PINECONE_API_KEY,
    // httpAgent: agent
});

const index = pc.Index(process.env.PINECONE_INDEX_NAME);

const storeEmbedding = async (id, embedding) => {
    try {
        await index.namespace('ns1').upsert(
            [
                {
                    id,
                    values: embedding,
                    metadata: {
                        text: "This is a sample document text"
                    }
                }
            ]
        );
    } catch (error) {
        console.log("Error while Storing Embedding")
        console.log(error);
    }
}

const queryPinecone = async (query) => {
    try {
        const queryEmbedding = await generateEmbedding(query);
        const response = await index.namespace('ns1').query({
            vector: queryEmbedding,
            topK: 5,
            includeMetadata: true,
        });
        console.log("Response from Pinecone Query")
        console.log(response)
        return response.matches.map(match => match.metadata.text).join(' ');
    } catch (error) {
        console.log("Error while Querying Pinecone")
        console.log(error)
    }
}

export { storeEmbedding, queryPinecone };
openaiService.js (OpenAI Integration)
import OpenAI from "openai"
import dotenv from 'dotenv';
dotenv.config();

const openai = new OpenAI({
    apiKey: process.env.OPENAI_API_KEY,
    organization: process.env.OPENAI_ORGANIZATION,
    project: process.env.OPENAI_PROJECT_ID,
})

const generateEmbedding = async (text) => {
    try {
        const embedding = await openai.embeddings.create({
            model: "text-embedding-ada-002",
            input: text
        });
        console.log("Response from Generating Embedding")
        console.log(embedding)
        return embedding.data[0].embedding
    } catch (error) {
        console.log("Error while Generating Embedding");
        console.log(error);
    }
}

const generateAnswer = async (question, context) => {
    try {
        const completion = await openai.chat.completions.create({
            messages: [{ role: "system", content: `Answer the question based on the context: \nContext: ${context}\nQuestion: ${question}` }],
            // model: "gpt-4",
            model: "gpt-3.5-turbo",
            max_tokens: 300
        });
        console.log("Response from OpenAI Chat Completion")
        console.log(completion.choices[0].message)
        return completion.choices[0].message.content.trim();
    } catch (error) {
        console.log("Error while OpenAI Chat Completion")
        console.log(error)
    }
}

export { generateEmbedding, generateAnswer };
Run both the applications
For front-end
npm startFor back-end
node app.jsFirst, upload a sample PDF document, and then start asking questions about its content.
And that’s it — BOOM! You’ve officially built the app! Give yourself a pat on the back, a victory lap, or maybe even a celebratory snack. The AI assistant world just got smarter, thanks to you!

The Challenges (a.k.a. Debugging Adventures)
- UNABLE_TO_GET_ISSUER_CERT_LOCALLY:
This one’s a classic. I spent more time Googling this error than actually building the app. Turns out, it’s an SSL issue. Addingprocess.env.NODE_TLS_REJECT_UNAUTHORIZED = '0'saved the day (for testing only). - Invalid Vector Values:
“Starting an object on a scalar field” was Pinecone’s way of telling me my embeddings weren’t in an array. Always double-check your payload. - 429: Too Many Requests:
OpenAI didn’t like my enthusiasm during testing. Lesson learned: set a rate limit and use caching wherever possible.
What I Learned
- AI is Powerful but Pricey: Those API calls add up. Use your free trial wisely, or your wallet might start crying.
- Vector Databases are Awesome: Pinecone makes searching context lightning fast and painless.
- Always Handle Errors Gracefully: Debugging gets exponentially harder when error messages are cryptic (or nonexistent).
A Sprinkle of Humor
This proof of concept isn’t perfect, but hey, it doesn’t give me answers about Napoleon when I ask about refund policies. That’s a win. Plus, it’s proof that even a Pinecone can be smarter than me if paired with OpenAI.
Final Thoughts
Building this AI Agent was a fun, educational ride through the world of vectors, embeddings, and APIs. The stack worked like a charm, and the experience gave me a newfound appreciation for how powerful these tools are when combined.
The possibilities are endless. You could extend this app to:
- Support multiple file formats like Word docs or CSVs.
- Add authentication for personalized experiences.
- Implement analytics to track common questions and responses.
This POC was a blast to build, and I hope it inspires you to create something awesome. Whether you’re exploring AI for fun or prototyping the next big thing, this stack is a great starting point.
Happy coding, and may your vectors always find their way home!